Tuesday, March 29, 2011

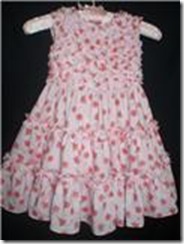
Pink Ruffle Challenge Dress

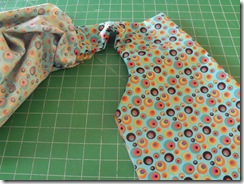
Don’t let the words challenge throw you off, that became the name of the dress Betty did for a challenge given on Everything sewing.  We have monthly challenges and this challenge was what would you do with fabric, not picked by you. So we exchanged names and sent each other fabric.  Betty always seems to come up with something extra special and this was one of those special designs. Many wanted to know how she did it, so she is sharing that with us.

picturetwo pictureone

DRESS INSTRUCTIONS:

You will need a light weight fabric that ravels some,  I think this fabric Sylvia sent me had some rayon in it…a cotton/poly blend will not work,  maybe a flimsy cotton?       Buy extra for the tons of ruffles and the three tier skirt.  Plain gathered skirt will do well also.

Pattern:  Any basic dress pattern, will use bodice front and back pattern pieces only.  A ruffler  attachment makes ruffling easier but gather any way that works for you.

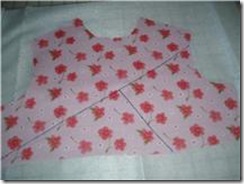
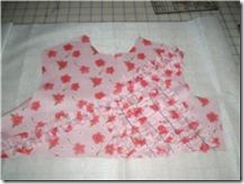
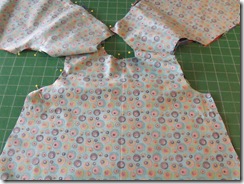
1. Cut front and back bodice, also the lining.  I used the same fabric for both.  Lay one front out flat and mark the two lines as shown for the ruffle placement.  You will sew a ruffle over the lines so don’t worry about markings.

how to first pcture

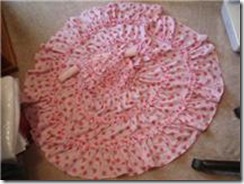
2.  Be sure to allow enough fabric for your choice of skirt now,  either a simple gathered or a three tier skirt.  For a three tier skirt decide how long you want it finished,  then divide by three and add one inch for half inch seam allowance.  I added 1 1/2 times for gathering of each tier,  using a hemming foot for the bottom for the bottom hem.   Hint:   before using the foot,  trim each seam allowance for about 3/8”, this allows the hemmer foot to go right over seams and hems nicely.                                                                                      

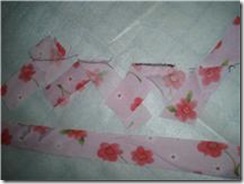
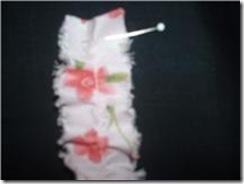
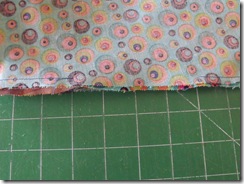
2a.  Cut bias strips from remaining  fabric 1'” wide for the bodice, join bias strips and finish before gathering.

picturethree 

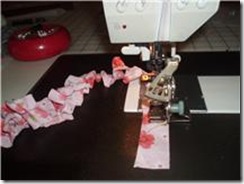
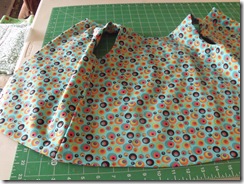
3. I used a gathering attachment to gather down the middle of the joined bias strips,  what a breeze but any way you want to gather down the middle will work just fine.

picturefour

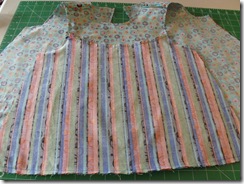
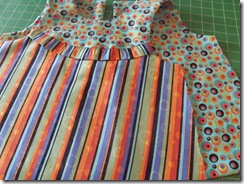
4.  On the bottom half of the bodice lay a gathered strip over the marked line,  start at the other line for placement, top stitch over gathering stitching to the bottom,  cut off.          Start the second gathered row next to the first one with just the edges touching.  Do this on both sides until the bottom half is covered.   Sew the next gathered strip over the marked crosswise line,  this will cover the top edges of the first strips.    Continue covering the top half with the edges touching until it is completely covered.     Sample is sewn with black thread both gathering and stitched down, as you can clearly see,  it does not have to be perfect,  matching thread does not show at all.  Neater is better of coarse,  this is to show a beginner sewer can do this with success.

picturefive picturesix

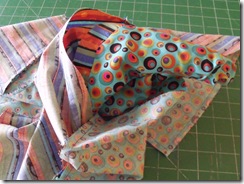
5.  Last but not least,  spend an evening in front of the television and use a thumb nail scratching each edge to make it ravel.  Some bias ravels more going different direction, so try both ways at each new joined pieces for the best results.     A good washing should do the same thing.   I didn’t want to wash mine before pictures. 

Thursday, March 24, 2011

From this to----this

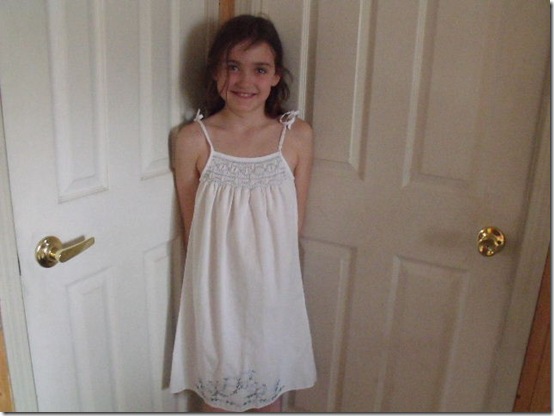
I recently did a sew along for our smocking group, showing how to turn a pillowcase into a smocked wearable ,depending on the case you chose it could be used for sleepwear or a sundress.   Now, my example is not finished as I have been debating with myself as to what kind of hem it should have.  I took off the ugly lace, and was thinking of adding a different lace but that might be over kill so now I am thinking of just doing a very small rolled hem.

2011_0205stuff0001  

As you can see, this case was not in very good shape. It also had some stains I was sure I could get out with a good soaking in Biz.  I am happy my Zoe agreed to model the after for me.

2011_0320stuff0009

2011_0320stuff0010

I hope I can share pictures of what the other members have done with their projects. I am sure they will all be different and we will all get even more ideas of what we can do on our next project.

Wednesday, March 23, 2011

Blogging again

I have been having all sorts of internet problems.  Finally I realized that the company was changing over from Verizon to Frontier, so I had the wrong modem.  Still all the kinks are not worked out but I can at least use the computer again.

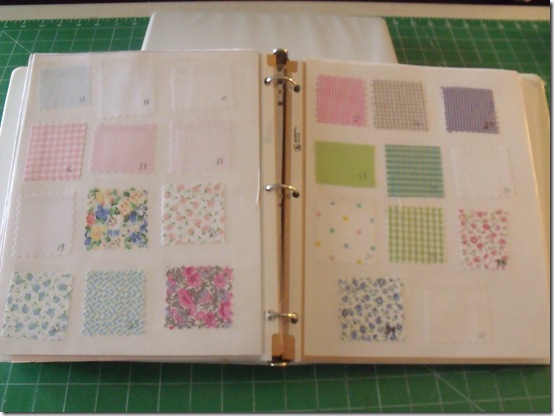
One of the things I did while not being able to connect on line was to work on my notebooks.  I have several note books, I find it just makes finding things so easy.  The one I think is my favorite is my fabric notebook.  Since I order a lot of fabric on line, I keep a notebook of fabric samples, where I bought from, the price, and a note about the kind of service received.

2011_0312stuff0002  

As you can see each piece has a number, then on a separate sheet I have the all the information about the sample. When time to order fabric I have my own little fabric store right in my hand.

Wednesday, March 9, 2011

Lining a top with a button back

I made this top using Bonnie Blue pattern ‘Madison’, it is fully lined and buttons down the back. I know lining can be confusing especially when the back is in two pieces. 

2011_0302stuff0001

Because the view I chose for this pattern also has a separate yoke, the piece I used for the lining was the one piece top pattern. When lining a A-line dress you can pull the lining through an opening left in the lining, when you have a two piece back you will need to approach it a little different.  After sewing your shoulder seams together on both lining and fashion fabric lay the lining on the fabric and sew neckline, hem and back opening.  I pretty much know what you are thinking at this point.

2011_0301stuff0014   2011_0301stuff0015 Notice the side seams have not been sewn, those have been left open.

Now, to turn this puzzle, reach through the side opening, and work the back piece through the shoulder.

2011_0301stuff0017 2011_0301stuff0018 Yes, it will work, pull each side through the shoulder opening.

2011_0301stuff0019 You now have top fully turned and it’s time to give it a good pressing. Yes, you still have to deal with the side seams.  So, reach inside the top front between lining and garment and pull the opposite side seam together. Pin right sides together lining to lining, garment to garment.

2011_0301stuff0020 You will be sewing in a circle.  Completely sew one side in a full circle, when doing the other side leave a 4” opening in the lining you will need this opening to pull the top through.

2011_0301stuff0021 This opening is left in only the lining. You will pull the garment through this opening.

2011_0301stuff0022 Now, hand stitch the small opening closed and you have a fully lined top.  You can line any top or dress using this method.  I like items that are lined, they are so much neater.